Listen up, tech wizards and hobbyists! If you're diving into the world of Raspberry Pi and want to access it remotely using SSH, you're in the right place. Accessing Raspberry Pi SSH remotely is like giving yourself a secret passageway to your little computer, no matter where you are. Whether you're a seasoned pro or just starting out, this guide will help you unlock the door to remote access without breaking a sweat.
SSH, or Secure Shell, is your ticket to controlling your Raspberry Pi from afar. It's like having a remote control for your device, letting you manage files, run commands, and even troubleshoot issues without needing to be physically present. But here’s the catch—getting it set up can feel like solving a puzzle if you're not familiar with the process. Don’t worry; we’ve got your back!
In this article, we'll walk you through everything you need to know about accessing Raspberry Pi SSH remotely. From setting up SSH on your Pi to configuring your network and using tools like PuTTY or SSH clients on your computer, we’ll make sure you're good to go. Let's dive in and turn you into an SSH ninja!
Read also:Who Is Barmaid Rose Unveiling The Remarkable Story Behind The Iconic Figure
Here’s what you’ll find in this guide:
- Enable SSH on Your Raspberry Pi
- Find Your Raspberry Pi's IP Address
- Set Up Port Forwarding
- Using SSH Clients on Windows, Mac, or Linux
- Set Up Dynamic DNS for Remote Access
- Tighten Your SSH Security
Enable SSH on Your Raspberry Pi
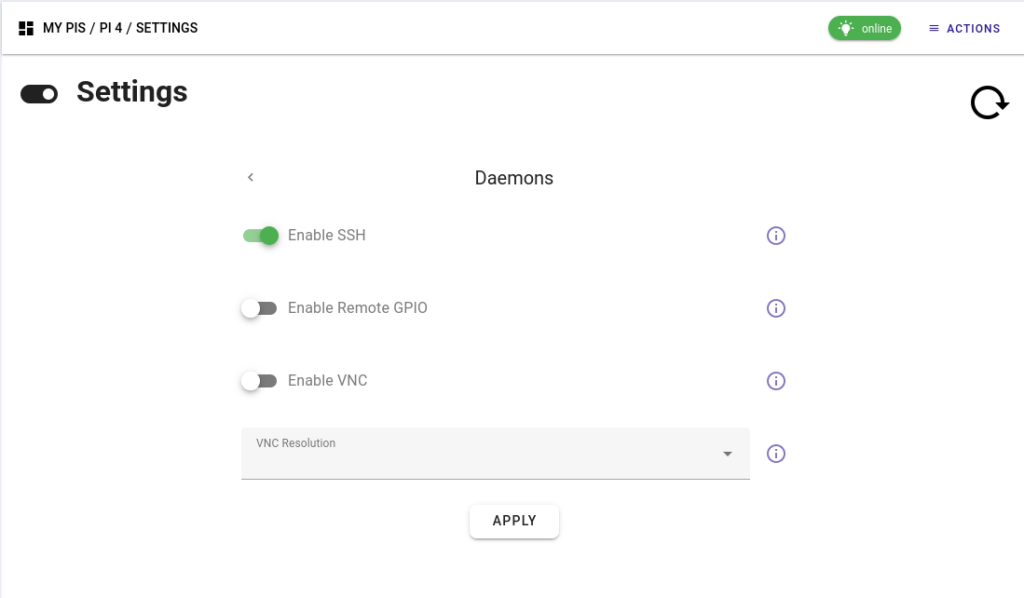
Alright, let’s start with the basics. Before you can access your Raspberry Pi SSH remotely, you need to make sure SSH is enabled on your device. Think of this as flipping the switch to allow remote connections. Here’s how you do it:
First off, boot up your Raspberry Pi and log into the desktop environment. Now, head over to the Raspberry Pi Configuration tool. You can find it in the main menu under Preferences. Once you're there, click on the Interfaces tab. Scroll down until you see SSH, and toggle it to Enabled. Boom! That's it for enabling SSH on your Pi.
Alternatively, if you're comfortable with the command line, you can enable SSH by typing:
sudo raspi-config
Then navigate to Interfacing Options, select SSH, and choose to enable it. Easy peasy, right?
Read also:How Old Is Philippa Braithwaite Unveiling The Stars Journey And Age
Why Enable SSH?
SSH is your secure bridge to interact with your Raspberry Pi remotely. Without enabling it, your Pi won’t listen for incoming SSH connections. So, enabling SSH is the first step in this journey.
Find Your Raspberry Pi's IP Address
Now that SSH is up and running, the next step is figuring out your Raspberry Pi's IP address. This is kind of like finding the street address of your Pi so you can send it a letter—or, in this case, a connection request.
There are a couple of ways to find your Pi's IP address. The simplest method is to open a terminal on your Pi and type:
hostname -I
This will spit out your Pi's local IP address. It’ll look something like 192.168.1.100. Write that down because you'll need it later.
Another way is to log into your router and check the connected devices list. Your Pi should be listed there with its IP address. This method is especially useful if you’re managing multiple devices on your network.
Why Do You Need the IP Address?
Your Pi's IP address is its unique identifier on your local network. When you try to connect to it via SSH, you need to tell your computer exactly which device you're trying to reach. Without the correct IP, you're basically shouting into the void, hoping someone listens.
Set Up Port Forwarding
Alright, here comes the slightly trickier part—port forwarding. Think of your router as a gatekeeper for your home network. By default, it blocks incoming connections from the outside world to protect your devices. Port forwarding is like giving the gatekeeper specific instructions to let certain traffic through.
To set up port forwarding, log into your router’s admin interface. This usually involves typing your router’s IP address into a browser—something like 192.168.0.1 or 192.168.1.1. Once you're in, look for the port forwarding section. Create a new rule and forward port 22 (the default SSH port) to your Raspberry Pi’s local IP address.
Make sure to save your changes and restart your router if necessary. Now your Pi is ready to receive SSH connections from the outside world.
Troubleshooting Port Forwarding
If you're having trouble getting port forwarding to work, double-check your router settings. Sometimes routers have additional security features that might block incoming connections. Also, ensure your Pi’s IP address is static so it doesn’t change and break your port forwarding rule.
Using SSH Clients on Windows, Mac, or Linux
Now that your Pi is all set up, it’s time to connect to it from another computer. For this, you’ll need an SSH client. If you’re using a Mac or Linux machine, you’re in luck because SSH is built right into the terminal. Just open a terminal window and type:
ssh pi@your-pi-ip-address
Replace your-pi-ip-address with the actual IP of your Pi. When prompted, enter your Pi’s password, and you’re in!
On Windows, things are a bit different. You can use a tool like PuTTY to connect to your Pi via SSH. Download PuTTY, enter your Pi’s IP address, select SSH as the connection type, and hit Open. Follow the prompts, enter your password, and voila—you’re connected.
Alternative SSH Clients
Besides PuTTY, there are other SSH clients you might want to explore, like MobaXterm or Bitvise SSH Client. These offer additional features and might be more user-friendly depending on your preferences.
Set Up Dynamic DNS for Remote Access
Here’s where things get really cool. If you want to access your Raspberry Pi SSH remotely from anywhere in the world, you’ll need a way to find it even if your home IP address changes. That’s where Dynamic DNS (DDNS) comes in.
DDNS services, like No-IP or DuckDNS, assign a fixed hostname to your changing IP address. This means you can always reach your Pi using a consistent address, like myraspberrypi.ddns.net, instead of worrying about what your current IP is.
To set up DDNS, sign up for a service, create a hostname, and install the DDNS client on your router or Pi. The client will automatically update your hostname whenever your IP changes.
Why Use DDNS?
Your home IP address can change periodically depending on your ISP. Without DDNS, trying to access your Pi remotely would be like playing a game of hide and seek. DDNS ensures you always know where to find your Pi, no matter what.
Tighten Your SSH Security
With great power comes great responsibility. Now that your Raspberry Pi is accessible from anywhere, it’s crucial to secure it properly. The last thing you want is some random hacker taking over your Pi because you left the door wide open.
Here are a few tips to tighten your SSH security:
- Change the default SSH port from
22to something less common. - Disable password authentication and switch to using SSH keys for added security.
- Limit SSH access to specific IP addresses if possible.
- Install a tool like Fail2Ban to block repeated failed login attempts.
By implementing these measures, you’ll make it much harder for unauthorized users to access your Pi.
SSH Keys vs Passwords
Using SSH keys instead of passwords is a game-changer for security. SSH keys are like digital passports that authenticate your identity without needing to type in a password every time. They’re more secure and convenient once set up.
Understanding SSH and Its Importance
SSH, or Secure Shell, is more than just a way to connect to your Raspberry Pi. It’s a protocol that allows you to securely communicate with remote devices over an unsecured network. This makes it invaluable for tasks like file transfers, system administration, and even running scripts remotely.
By mastering SSH, you’re not only learning how to control your Raspberry Pi from afar but also gaining a powerful tool that can be applied to many other areas of tech and networking.
SSH Beyond Raspberry Pi
Once you’ve got SSH down pat with your Raspberry Pi, you can apply the same principles to other devices and servers. Whether you’re managing a web server or automating tasks on a remote machine, SSH is your trusty companion.
Conclusion
And there you have it, folks—a comprehensive guide to accessing your Raspberry Pi SSH remotely. From enabling SSH and finding your Pi’s IP address to setting up port forwarding and securing your connections, we’ve covered all the essential steps.
Remember, the key to successfully accessing your Raspberry Pi SSH remotely is preparation and security. Take the time to set everything up correctly, and don’t neglect the importance of securing your connections.
So, what are you waiting for? Grab your Raspberry Pi, follow the steps in this guide, and start exploring the world of remote access. And hey, if you found this article helpful, don’t forget to drop a comment or share it with your tech-savvy friends. Happy tinkering, and may your SSH connections always be secure and smooth!